Showing posts with label strategy guide. Show all posts

Saturday, September 28, 2013

Pocket Trains Strategy Guide, Tips and Tricks


If you're looking for a strategy guide or tips and tricks on making tons of coins and bux in Nimblebit's latest iOS game Pocket Trains, then look no further because listed below are tips and tricks on how to best manage your fleet of Pocket Trains on your way to global locomotion domination. A word of caution though before you plunge into this addictive game -- Pocket Trains will take over your life if you're not careful!


Build up your collection of trains, transport cargo across your network, and expand your network to unlock better trains and more lucrative jobs.

Delivering Cargo - Do I need to stop at a station to deliver cargo, or does just passing through work? For example, I have cargo for station A and B, do I need to stop at A and B separately or can I just head straight to B, passing A along the way? Things get dropped off automatically as you move through, no need to stop.

Jobs Don't Regenerate - Once you stop at a station, the jobs for that train will remain the same until you leave (and return).

Not All Jobs are Created Equal - Jobs to the same location may have different values depending on a scale of 1-4 coins. Also, a single job may have 5 cars or 1 car. Watch out on how many cars your train can pull and balance the value of each job with your capacity.

One Train per Route - You can't send more than one train per track. Plan carefully and accordingly.

Trains Need Fuel - Transporting jobs uses up fuel and your train will need to eventually re-fuel before getting back to work.

Trains can Break Down - Maintenance will need to be performed after a certain mileage is put on. This can be paid for with coins or by using a spare part.

Common Issues
Tracks
Expanding your track network will cost coins. The cost is dependent on the length of the track you are unlocking. You will need to pay an additional coin fee to assign an engine to your new track. Always keep that last point in mind. Also, you will get significantly less coins back from closing tracks. Plan very carefully as you expand.

Railroads
A railroad is separate from a track. A railroad is the network of tracks assigned to an engine. The cost to start a new railroad (i.e. add another engine to your empire) goes up significantly with each railroad you add.

You create a new Railroad by hitting the New RR button in your menu, assigning it to a Train in your Yard, and selecting a city to start the Railroad from.

Assembling new Trains
While earning coins and bux, you will occasionally see a Train Part show up as a job. If you deliver this, you will have a crate in your Craft list. It'll cost 10 bux to open it and it will contain 1 part for a Train. Once you have enough parts to build a new train, you can build an Engine or a Fuel Car (building these costs nothing) and place the newly built equipment in your Yard.

Note: There are two types of Crates, Normal and Special. You can get Special Crates by doing events and leveling up.

FAQ

When do new train types start showing up in my crates?
Around level 5 or 6 for the step up from Steamers.

Are the parts in crates determined by the level you were when you received the crate or when you open the crate?
When you open the crate.

Can I change the engine on a railroad without re-buying all the routes?
Yes! Get the train currently on that line into a station, click on the Train button, and select 'Swap Engine'.

How do I know when I'll need to repair my trains?
You'll get a pop up notifying you when your train needs repairs. It'll also get a little caution symbol on your train list.

What can I upgrade my train to do?
Trains can receive upgrades by adding extra engines or fuel cars. Check the Train info screen to find out what upgrades, if any, you're allowed to buy.
Extra Engines increase your cargo capacity by 50%.
Fuel Cars increase your fuel capacity by 100%.

How do I gift parts? What's a friend code?
To enable cross platform sharing, Nimblebit implemented their own friend codes and the game will prompt you for your friend's code when you gift a part. It's found on the Options screen in the Menu. 

{source: somethingawful.com}


Sunday, June 16, 2013

Mojang's Scrolls Strategy Guide, Killer Decks, Tips and Tricks


Scrolls ($20.00) is Mojang's second game after the "little-known" Minecraft. It is a collectible card/scroll game that liberally borrows mechanics from other well known and established CCG games like Magic the Gathering while incorporating hex based movement and a novel way for managing resources.

Scrolls Strategy


The board is broken-up into three regions: two outer staging wings on either side consisting of a single lane of hexes each and a central area that should see most of the aggressive plays from either player. Your ultimate goal is to control the center-most lane of hexes:


The concepts at work her are simple enough - when your units become active, with a few exceptions, they can attack the lane they are in, the lane above their position of the lane below their position. The middle 3 lanes therefore provide the most options for attack, while the middle lane is the one most exposed to attack by units in aggressive positions. If you can eliminate the enemy's idol in the middle lane before they can eliminate yours, you can then concentrate on attacking / defending areas that your opponent has fewer active options in while being down an idol.

You can contest the center obviously by playing units into it, or by dropping units into the outer wings - where they cannot be attacked by centrally placed units - as a feint maneuver, or by dropping artillery units into the lanes just above or just below the center where they can control central space while your opponent cannot directly threaten them with units sitting right in moneyville.


If I'm the first player to drop a unit onto the field, I almost always drop it right on the money. If it's an aggressive unit like a Kinfolk Brave, it gives me the initiative & allows me to threaten the 3 most active lanes; if it's a passive unit like this memorial, I'm set to protect anything I want to drop in the center.

The wings of the board are where you want to go if you feel like the center has been lost to you; they aren't active spaces, but are difficult to mount effective attacks against because they're effectively bottle-necked (there's only one lane with access to either wing). It is a much, much better idea to concede middle ground for a while and just play units into these safe areas if you feel that you've lost out in tempo / aggression to your opponent - attacking ineffectually into a superior position will just guarantee a loss most of the time.

{source: forums.penny-arcade.com}

The Anatomy of a Scroll {source}


Scrolls Tips and Tricks {source}

  • Keep board control! If you’ve a choice between damaging your opponent’s idol or creature, it’s probably better to hit the creature. Prioritise units that will attack next turn.
  • It’s OK to let your idols take a few hits. Don’t give up a unit unless it’s completely necessary or part of your strategy.
  • Always check your unit’s countdowns and those of your opponent’s units.
  • Remember to take advantage of your units’ mobility: pull them out of harm’s way, move them in to strike, or block an opponent’s attack with shrewd planning.
  • Sacrifice for resources early on, then move towards a mix of resources and scrolls later.
  • If you’re down to your last scroll, it’s almost always worth sacrificing it for two more.
  • The more lean your deck is, the more control you have over your forces. There’s a minimum of 50 scrolls per deck. You probably don’t want to include more than that.
  • Stick to single resource decks when starting. It’s easier to learn basic strategy that way.
  • Make sure your deck has good resource balance. You want some scrolls to play early-on as well as some hard-hitting finishers for the late game.
  • Scrolls can be common, uncommon, or rare. You can tell the rarity of a scroll by its border, and weathered edges.
  • You can spend your hard-earned gold on new scrolls. You can also sell any you don’t need back to the store at a reduced price. You’ll probably get a better deal by trading with other humans though. Check out the Trading room and make some friends!
  • Watch out for the cheeky notifications in the top right corner. Click them to join games.
  • Press “Ctrl” to show stats (Attack, Countdown and Health) for all units and idols on the board.
  • Press Enter to chat with your opponent during a game.
  • You can join any room by typing its name into the “join or create custom room box.” You can also create your own rooms for friends/enemies this way.
List of Scrolls
Online Deck Builder
Killer Decks 

Scrolls Price Guide 
Scrolls FAQs 

Where do destroyed/sacrificed cards go?
When your draw deck runs out, destroyed/sacrificed cards are shuffled to create a new draw pile. There is no visual indication, but it has been confirmed that it works this way.

Should I buy 10 random/ 1 random/ 1 faction-specific scroll(s)?
Disclaimer, this is somewhat subjective and should probably include multiple bullets
  • Math in this comment indicates if you buy 10-randoms and sell everything that's not from your faction, you come out slightly ahead. However it's also noted that keeping out-of-faction rares eliminates this economic advantage.
  • If you're new and don't want to spend time trading, in-faction scrolls can help you build of sets of 3 for the commons and uncommons you want in your deck.
What is the attack order?
Front column top row to bottom, middle column top to bottom, back column top to bottom.

How many scrolls should I have in my deck?
Generally for any deck-building game the recommendation is to have the minimum number of cards required in your deck (50 in the case of Scrolls) to make your deck behave as consistently as possible. For this same reason, you should generally have the maximum number allowed of each scroll in your deck (3 in the case of Scrolls). Of course these are both guidelines and may vary with your individual deck.

How do i tell the rarity of a scroll?
There are 3 types of rarity: common, uncommon and rare. When you buy random scrolls 70% will be common, 20% will be uncommon and 10% will be rare. Rare scrolls are darker and more torn around the edge, uncommon a little less dark and torn and common even less dark and torn.

{source:reddit.com}

Thursday, November 22, 2012

Puzzle & Dragons Strategy Guide, Tips and Tricks


 The main tip that I can suggest is to really get the most out of everything you do - run half stamina dungeons to get coins/EVO Materials/Rank-up.

Fuse using materials of the same Attribute for bonus EXP(or Metal Dragons of course!). Don't Evolve Fusion your monsters unless you have enough materials to Power-up Fusion immediately after (when you Evolve, you go back to level 1 but with greater potential to level up higher). When you get to higher levels, consider selling weaker monsters instead of using them for fusion since the fusing will end up costing more than it's worth.

Balance your teams: try finding a sweet spot with RCV and HP for survivability - don't just focus on attack or you will find yourself getting one-shotted very quickly.

Finally - take a look at your helper's stats before you bring them along. Even if a Monster has no Leader Skill (or you can't utilize it because they are an Explorer and not a Friend), someone with 3,000 HP is a great asset!

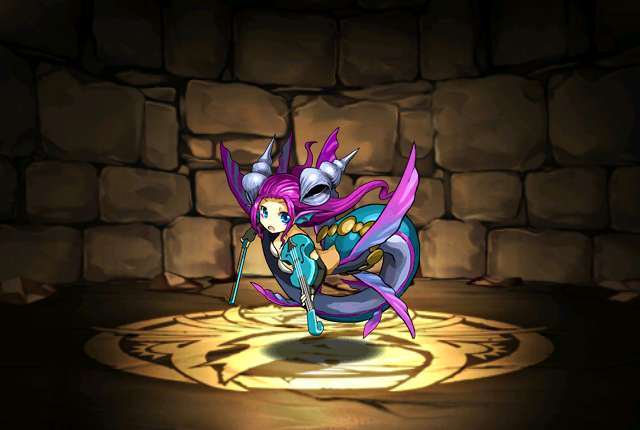
A tip for new players who have Siren:


You can upgrade the level of Siren's skill(Guard Stance - Water). Just stock up 5 Marine Goblin and use them as fusion material for your Siren, and you have pretty good chance to level up Siren's skill. The max level is 7 and then you can use it every 5 turns instead of 11. Marine Goblin is very easy to get in Sea Cave Mercury and Polar Night Tower.

This is why Siren is a great monster for starters. With Siren's skill and other skills that can change heart orbs into other orbs, you can make great combo. I recommend farm for one no matter what color team you are planning to play.

The enhance materials are used to power up your own monsters. There's some birds you get from the technical dungeon that are enhance materials. However, they start out at level 2 and you should use a monster to max it out. At level 2 the bird will give around 1.2k exp. If you fuse it up to max level with another monster it'll give out 9k exp instead.

How to pass the mask dungeon master level

The requirement is that you should have Shiva(#236) or Shiva helper. in the first round, the monsters' attack is not too high. Just clear orbs which can not make attack to enemies. Do it again and again until the Shiva's active skill is ready. Then use the skill and finish the dungeon. Although Shiva's skill effect only one turn, you can still use it if you clear the enemies in one turn.

Monster drops

All monsters have a chance to drop eggs, but the rate of some of them are extremely low. For example, like mermaid, naga, vampire, titan etc. they have a pretty high drop rate in normal dungeon, but only around 1%~2% from my 8 months experience. By contrast, you can think the some of monsters never drop eggs, such as 5 element knights, god type monsters, salamander, basilisk etc., in normal dungeon. However, some of them have a higher drop rate or 100% drop rate in some special or event dungeons. But for now, if you want to get it by run the dungeon, the only thing you can do is wait and log in on that special day. In addition, the time for waiting may be one or two months long, and the event only last one day or 12 hours. 

Dragon fruit

Don't sell your dragon fruits; feed them to one of your monsters! You'll only get 120g if you sell a dragon fruit, but it's worth 5000xp if you use it for leveling up.

Norse gods

There are two Norse gods that are so powerful and worth to get them. One is Green Odin whose leader skill is 80% damage reduced when HP is full and active skill is light damage by 20 times his ACK. The other one is Loki whose leader skill is 2 times ACK and RCV of dark element team members. The Loki is such important, since RCV of almost all dark monster is not too high relatively.

Special dungeons

Every special dungeon has different requirement to be broken. For blizzard dungeon, the damage of final boss is 17100 for adept level, 31907 for expert level and 68910 for master level! It seems impossible to break it. However, the boss only attacks 8 turns. That means you have enough times to recover your hp. Try a monster whose leader skill is resolve to be leader.

Best easily obtainable source of experience to level up your monsters

Before Satan's Castle, those 5 colors of Carbuncles.
After Satan's Castle, definitely Pendras.

Just wait for the Metal, Gold, Emerald, Ruby, and Sapphire Dragon dungeons and just farm them. However, you can also use Pengdras. Their the small, penguin-like monsters tht you can catch in ghe technical dungeons. There's Green, Red, and Blue Pengdras. Also, you can evolve them into an Emepror Pengdra of their respective color, which can be used to greatly level up your monsters.

If that doesn't work out for you, you can also try using monsters you end up getting duplicates of.

Calculating damage

For every combo you make, no matter what color the orbs are, your attack power goes up by 25%. For every extra useful combo there is, your attack power goes up by 100%.
Every monster have a defense value. Your actual damage to the moster should be your attack power minus the defense value. If your attack power cannot exceed his defense, your damage becomes 1.
The attribute boost(fire against wood, light against dark, etc.) is applied before the defense value is calculated. So are all the boosts got from leader skills.
Let's say your monster's ATK is A, and you come up with a chain of N combos, and M of them is of the useful color, and the monster have a defense of D, then the formula is like this:

Final damage = A x 100% x M x (100% + (N-1) x 25%) - D

Let's see an actual example. You have to beat a wood boss with a DEF of 2000. What you have is a fire monster with only 500 ATK. Normally your damage will just become 1. But you put it in a 4x fire team. You made a chain of 6 combos. 3 of them is of fire orbs. And here is what happens:

Your final damage = 500 x 3 x (100% + (6-1) x 25%) x 4 x 2 - 2000 = 25000

Pretty amazing, right?! That is what we call explosive power. And this is just from only one monster, a team has six monsters, think how much damage they would deal in total.

So this is why a 4x team is great. With damage like this you can definitely sweep most bosses in the game in a few turns. Only those in Master levels cannot be killed quickly because they have huge tons of HP. Some of you may think making 6 combos or having that much useful orbs is hard, but let me tell you, with a orb-changing skill this is very easy. So the crucial member in every 4x team is the orb-changer. Without a orb-changer, a 4x team is disabled. Still strong, but the explosive power is lacking.

List of Gods that is recommended you reroll for:

Roman Gods: none
Japanese Gods: Viper Orochi, Amaterasu
Indian Gods: Shiva
Norse Gods: none of them, norse gods suck
Misc God: Green Odin
*Special Exception: Valkyrie (can only be found in the rare egg machine and is used for unique and powerful healer teams)

This is a very short list and your chances of getting one of these are microscopically small but this is the list if you want the best of the best of the best from the rare egg machine. Here are the rest that are acceptable to keep:

Roman Gods: Venus, Hades, Neptune
Japanese Gods: Yomi
Indian Gods: Parvati, Lakshimi, Vritia
Norse Gods: lol yeh rite
Misc God: Blue Odin
Very Hard to Farm Orb Changers: Berserker, Highlander
Commonly Farmed Non Gods (These you can eventually get them easily some other way later on without the rare egg machine but these are all classified as super useful and everyone will want to be friends with you for them):
Siren the Enchanter, Ancient Dragon Knight, Archangel, Alraune

COMING SOON...

Strategies for getting lots of combos when matching gems?

Where to farm evo materials?

Where to start building and catching better monsters?

Friday, August 17, 2012

Puzzle Craft Strategy Guide, Tips and Tricks

Farmville + Dungeon Raid
Puzzle Craft [$0.99 AppStore] is a hybrid game of match 3 with a generous helping of town building that is all about the continuous interaction between the farming and mining to build new facilities in town that, in turn, will allow you to both farm and mine more effectively.

The basic premise of the game is this, you have two different match 3 games in it, one for farming, one for mining. Both gather different resources, farming is focused on gathering food, wood and hay, while mining is focused on stones, iron, dirt, and other minerals. It all starts out relatively simple, spend 30 gold on a farming session to collect food, which you use as a resource to be able to mine, gather some dirt, stone and iron in the mine for new buildings, and so on.

Spoiler: If you hold your finger for 2 seconds on every of the tiles it tells you something useful.

Gameplay

Farming: You have 24 turns to gather all of the resources you can. You're initially presented with a field of grass, wheat, chickens, and trees. During a single turn you simply try to chain a continuous path through one of these resources and, if you chain enough icons of a given item, you'll create a unit of that particular resource for use in the town. Simple stuff...but it gets trickier than this, of course. While grass wheat, chickens, and trees make up the default items, if you manage to make a long enough chain of one of these resources, when refilling the field with pieces, higher tiered items will be added into the mix (i.e. clear 8 wheat and a carrot will be dropped into the field). The tricky part then is trying to arrange things so that, while gathering the base resources, 3 or more matching units of these much rarer items can be strung together, which if in turn are gathered in large enough batches, can lead to even rarer drops (if it takes gathering over 8 wheat to make a carrot, and over 8 carrots to make an apple, how the heck are you going to ever get the needed minimum of 64 units of wheat to make this all happen within a mere 24 turns). At the end of 24 turns you'll be given the option to pay 200 coins to preserve the current field for your next farming session. If you have the money to spare this is really helpful as it means you won't have to start from scratch on your next farming session by already have a lot of those higher tiered items still in the field.

Mining: While this uses the same basic mechanics, it plays quite differently. To mine you first need to spend some of your current food supplies to enter the mine (the more food you supply, the more turns you can take before having to come back up from mining). Once you've decided how much food you'll be taking into the mine with you, you'll enter the mine making groups of dirt (lots and lots of dirt), rocks, and iron. Gather a big enough group of rocks and some pieces of coal will show up in the mine. If you later gather a big enough pile of coal in a single move, a diamond will be dropped into the mine! So while this then sounds a lot like farming, there is another unique twist to mining via the gas explosions! If you gather 8+ pieces of dirt in a single move it will create a gas cloud. While single gas clouds, one their own, are no more than annoying obstacle taking up space something useful could appear, if 3+ of these gas clouds manage to land adjacent to one another there will be a gas explosion which will immediately terminate your mining session (no sure if you still get to keep what you'd dug up so far in this session or if it is all lost)! Just try to make sure these gas explosions don't happen while you're down there. Here money can be used at the end of a run to buy a few additional turns (although you can't buy your way out of a gas explosion).

Town Building: Using the resources you've gathered from the farm and mine you can create all sort of useful structures, tools, and recruit workers. Each of these facilities, power-ups, and skilled craftsmen will help you by providing additional resources or making your future farming and mining runs more effective.


By selling off extra resources, leveling rewards (gathering resources and adding buildings to your town give you experience which in turn levels up your town giving you access to new structures, items, skills, and cash rewards), and building drops you'll have enough cash to get by. If, on the other hand, you want to power through the game much quicker by building structures without the required resources, saving your farm fields for the next session, or extending your mine runs, some IAP coins can make this all possible.

Posted below are some Puzzle Craft tips and tricks collected from gaming forums to guide beginners and help them get the most out of this game.

Tips and Tricks
  • Buy cottages, and first get people who decrease the wood/wheat requirements until that's maxed. You can get a ton of lumber and bread then, and you only need to sell 6 to get your 30 coins back.
  • Gas explosion doesn't stop your mining expedition. It just blows up the nearby tiles and transforms them into rubble plus dirt.
  • All you ever really need is 30 gold to farm. Once you unlock the marketplace, you can just sell 6 bread, which is almost nothing-- every time you farm you'll make many times more than that. It's even easier to keep going once you get the "free harvest" upgrades for wheat and chickens. 
  • There are lots of ways to spend gold in the game. You can rapidly spend gobs of coins and bankrupt yourself and the game is happy to let you do that. But none of that is necessary. Unless you have cash reserves, don't buy materials from the marketplace. You also don't need to save what is in your field for the following year (200 coins!) or pay to extend your mining operation by three turns (100 coins). Pay your 30 coins and do it again, instead.
  • You also get money from the marketplace on a one hour timer, and taxes go up as you upgrade your settlement.
  • The real challenge in the early game economy is acquiring stone (at least it has been for me). Every trip into the mine needs food, so you keep going back to the fields. Build a larder so you can stay in the mine and collect more stone--but then you need more food too, there's the balance.
  •  Long chains start giving you other resources. For instance, chain 8 grain and a carrot tile will drop, or chaining chickens will cause a pig tile to show up. You have to get enough of those tiles on screen so you can make a match with them to collect them (or use a tool). This actually changes the gameplay a bit. You don't necessarily want to collect all of a resource on screen. You might be better off to collect enough to get the bonus and leave some to try and get another when more fall (if 8 grain gave you one carrot tile and 16 would give two, collecting 15 would be a wasted opportunity). 
  • The rats eat crop items in the field. The countdown on their head goes down by one per turn, the rat then jumps and eats either a wheat or carrot. If they line up, you can clear by matching them like you would with the other things in the field. They give exp. You can do that with wolves too.
  • Free turns work when you match certain items. Certain buildings will allow you to match wheats and chickens without the day timer counting down when you do.
{source}


Thursday, August 2, 2012

Happy Street Strategy Guide, Tips and Tricks


Happy Street [AppStore Free] is a free Animal Crossing type of game on the iOS where you  can  build your own village, discover new places, make friends, play with mini games, fish, craft objects, collect resources and much more. Posted below are some tips and tricks collected from all over the web to help you enjoy the game even further.


Golden Tulip
The Golden Tulip grows randomly on the forest ground, so make sure to clear the trees in the forest.


Flooz
Flooz are a great way to expand your village, speed up construction of your houses, and sell off goods from your stores.

Free ways to get Flooz
-Buying them
-Leveling up
-Pepin missions (2 per day)
-Visiting friends (2 per day)
-Wheel game
-Spin game (free once a day + built/bought tokens)

Dragon Idol
For the Pepin missions: it takes less time to build a token (14h) than to build an Idol (19h) and you have a chance to get more than one flooz.

Black Lotus Requirements
Three red, three blue and three yellow flowers (no whites).

Crystal
The crystal is a new resource in the forest. You will need to unlock this parcel to access it. There are 3 different colors, and everyone gets only one of them.

Hotel
There's a hotel with up to 5 upgrades in the house menu, the hotel hosts guests from your friend's village and has a large bonus wallet, so they can spend a lot in your village. You will be able to upgrade this hotel if you have the 3 different crystals. To get the 3 different crystals you will have to trade or ask your friends to send them to you.

Workshop
Wood Plank - 15 Wood Log - 5 min
Wood Bucket - 2 Wood Plank - 1 hrs
Fertilizer - 6 Bird's Poop, 1 Water, 4 Wood Log - 2 hrs
Feather Necklace - 1 Rope, 8 Red Feather - 1 hrs 30 min
Flower Bouquet - 2 Red Tulip, 2 Blue Tulip, 2 Golden Tulip - 2 hrs
Rope - 10 Coconut, 1 Water - 3 hrs
Glue - 4 Birds Poop, 1 Water - 3 hrs
Paper - 2 Wood Log, 2 Water - 1 hrs
Pen - 2 Red Feather, 10 Wood Log - 1 hrs
Cut Moonstone - 2 Moonstone, 2 Wood Plank - 8 hrs
Lucky Token - 1 Moonstone, 1 Blue Dye, 1 Water - 14 hrs
Black Lotus - 3 Golden Tulip, 3 Blue Tulip, 3 Red Tulip - 8 hrs
Guitar - 2 Wood Plank, 2 Rope - 8 hrs
Black belt - 1 Black Lotus, 10 Wool - 4 hrs
Rainbow Fish - 1 Black lotus, 8 Edelweiss, 1 Carp - 4 hrs

Forest - Nyok's House
Apple Juice - 5 Apple - 5 min
Cider - 1 Apple Juice, 1 Golden Tulip - 1 hrs
Love Potion - 1 Mushroom, 3 Toadstool - 1 hrs
Mushroom Soup - 10 Mushroom, 4 Toadstool - 4 hrs
Mushroom Grog - 6 Toadstool - 8 hrs
Baked Salmon - 5 Mushroom, 1 Salmon - 4 hrs
Fish Soup - 3 Trout, 2 Carp, 1 Salmon - 4 hrs
Birthday Cake - 10 Apple, 2 Golden Tulip - 8 hrs
Blue Dye - 3 Blue Tulip, 1 Water - 2 hrs
White Dye - 3 Edelweiss, 1 Water - 1 hrs
Red Dye - 3 Red Tulip, 1 Water - 2 hrs
Orange Dye - 1 Yellow Dye, 1 Red Dye - 1 hrs
Yellow Dye - 3 Golden Tulip, 1 Water - 2 hrs
Green Dye - 1 Blue Dye, 1 Yellow Dye - 1 hrs
Purple Dye - 1 Blue Dye, 1 Red Dye - 1 hrs

Mountain - Studio
Cut Stone - 25 Rocks - 30 min
Anvil - 4 cut Stone - 12 hrs
Brick Oven - 100 Wood Log, 3 Cut Stone, 1 Wood Plank
Hammer - 2 Wood Plank, 1 Rope, 1 Cut Stone - 8 hrs
Dragon Idol - 10 Bat Tooth, 1 Cut Moonstone, 1 Glue - 8 hrs

{source}

Happy Street Crafting, Shop, House, Decorations, Quest Guide Spreadsheet{click here}


Saturday, January 14, 2012

Hero Academy FAQs, Strategy Guide, Tips and Tricks

Hero Academy is a free tactics iOS game that lets you challenge friends to one-on-one battles via online multiplayer. In order to help you get started on the game, here are some tips and tricks collected from destructoid's beginners guide and the robot entertainment's game guide.

Tips and Tricks
  • Controlling assault boost squares is often the key to victory. Place strong heroes on the assault tiles and force your opponent to deal with them.
  • You can’t move heroes on to your opponent’s deploy zones. If your opponent knocks out one of your heroes on your deploy zone, you can deploy one of your own heroes on top of the knocked-out hero on the next turn, provided you don’t mind sacrificing the knocked-out hero.
  • A Dark Elf necromancer can raise a phantom on your deploy zone, but you can auto-stomp the phantom by deploying a hero on top of him.
  • If you’re having trouble getting to the enemy’s crystal, don’t be afraid to switch strategies; killing all of his heroes is another way to win.
Council Strategy
  • Use the ninja’s teleport ability to swap places with frontline heroes for a quick hit-and-run attack. Save an Action Point to retreat him to the rear at the end of your turn.
  • Control assault boost squares with your knights. Add shields and helmets to make the knights virtually indestructible.
  • Save your swords for hard-hitting heroes like archers, wizards, and the ninja.
  • Keep an eye out for groups of enemies. Engage the groups with wizards or archers, then drop a last-minute Inferno to remove any knocked-out heroes at range.

Heroic Units

Strong Alchemy – Team Bonus

  • The Council’s clerics are excellent healers, and heal knocked-out heroes for extra hitpoints.
  • Potions can revive knocked-out units.
  • Save potions for quick emergency revives, especially for a hero with lots of equipment.

Knight (Fighter)

  • Sturdy fighter; knocks back enemy heroes when he attacks.
  • Very difficult to kill, especially if equipped with a shield and helmet.
  • Use knights to deny critical board positions to opponents, or knock enemies off important squares.

Archer (Shooter)

  • High-damage shooter with a long attack range.
  • Gets larger benefit from sword equipment and sword tiles.
  • Useful to attack distant enemies; rely on hit-and-run attacks to keep her safe.

Wizard (Caster)

  • Caster hero that can target enemy groups with chain lightning.
  • Lightning is unpredictable, but can hit up to three enemies.
  • Use against packed groups of enemies, and supplement his power with swords and scrolls.

Cleric (Support)

  • Support hero who can effectively heal damaged and knocked-out allies.
  • Both attacks and heals at range.
  • Use clerics to back up other strong or valuable heroes.

Ninja (Super Unit)

  • Unique super unit that can swap places with an ally.
  • Can attack at range, but does more damage in melee.
  • Use mobility to teleport to the front lines and back again in a single turn.


Inferno

  • High-damage attack spell that does damage in a 3x3 area.
  • Can remove knocked-out enemies from the field.
  • Use against clustered groups of weakened enemies, or to eliminate knocked-out targets at range.


Dark Elves Strategy
  • Nurture the wraith – he’s fragile until he consumes several knocked-out heroes. Bait your enemy into attacking your weaker heroes, then let your wraith consume his own team!
  • The necromancer’s long range can dominate the battlefield. Keep him on a power boost tile and let the enemy come to you.
  • Use the priestess to debuff the most dangerous enemies.
  • Save your Soul Harvest spells for the perfect opportunity; it will heal all of your knocked-out heroes at once!
Something Awful Hero Academy Forum Tips 

[1] Send a fully buffed knight into enemy territory. Then, have your ninja swap with the knight, deal out three blows, and swap back.

[2] Your healers can use the scroll buff, sword, or attack tile to increase their heal.

[3] Diagonal attacks are always ranged attacks, even if on adjacent squares, only horiz and vert attacks are melee.

[4] Always run through a couple of different scenarios before submitting your turn!

[5] Try to keep your units 2 AP away from your opponent's ranged attackers - you want your opponent to burn 2 AP just to get his attacker into range. Assuming that he wants to use 1 AP to pull the unit back, that only leaves 2 AP for attacks. If he doesn't use 1 AP to retreat at the end of his turn, he risks leaving the unit in your territory for you to stomp on.

[6] The fireball spell can remove KO'd enemies from the battlefield, which is useful when you don't want to risk using a unit to stomp on them.

[7] When using the Ninja, make sure you do a horiz or vert attack if you want the double damage bonus from melee attacks. A diagonal attack will result in the Ninja throwing one of his shuriken, which are apparently made of foam.

[8] The Ninja has excellent mobility, so hit-and-run with him, don't leave him in enemy territory after an attack.

[9] The Wraith can only consume corpses horizontally or vertically - if you diagonally attack a corpse, he'll just stomp on it.

    Thursday, December 8, 2011

    Battle Nations Strategy Guide, Tips and Tricks

    Battle Nations is an all-new action/strategy game that lets you take command of the elite Imperial Army as you expand and secure the empire. Gameplay includes gathering precious resources, building a thriving nation to power your machine of war, and training your troops to attack the rebel forces for dominance of the land.

    Game Impressions

    Pros:
    +Incredible graphics, best for a game of this type yet, so many great animations on your buildings, not a stagnant town like Crime City. In fact I think this is the best graphics in an iPhone strategy game
    +Like Crime City, you build out your area graphically, but you have to manage housing, food, resource harvesting and much more
    +Amazing campaign for a game of this type, great characters/back story/humor for quests
    +Best combat in a resource management game yet, tactical turn based battle against other players

    Now no one will confuse the combat portion for say, X-Com or Jagged Alliance, but it is way way ahead of games like Crime City where robbing someone's restaurant is just double tap on the building and wait for computer to calculate the result based on attack/defense stats.

    I really really really would love to see resource management games spend more time on combat. There is no reason why this type of games can't have a real combat system and this is the best one yet! Allowing the players to do more things like take cover, move their units on battle field would add a lot more depth.

    Cons:
    -Slow progression, may be too slow as most games of this type allows you to get to level 10 or so very very quickly, not so here, took me two days to get to level 7
    -May be a little too complex (stone quarry) in the beginning, once you get used to it, it is amazing
    -Combat system is good for a resource management game, but could give players more tactical choices like being able to move/cover their units. I would really like skill to play a bigger part in this, where a skilled player can beat a 100% army with a 90% army if he is really good at micro management
    -Better UI refinements. It is really tedious to heal your units in hospital for example. I have four grunts that takes 2 minute each to heal, would be nice if I can heal the whole stack and come back later instead of one at a time. {via hitmanb}


     Tips and Tricks

    -To maximize growth, you should aim for the closest stone quarries to the right and to the left; do not worry about the woods, one is all you really need and you start with one in your zone, and will be able to make use of it by level 9; start aiming for iron at around level 8, the iron mine unlocks at level 10, if you already headed for the stone at the left, you should have a grand total of 3 iron mines in or close to your zones. You gain 1 expand per level before 10, and 2 expand per level after 10, plan your expansion ahead of time.

    -Crops are great and easy way to get xp, but farming only for crops messes with your demand and lower the efficiency of your farms (or other crops production building). From playing around with the available production buildings, I’ve find “meat” to be a pretty good supplement, I’m currently running 2:1 worker ratio of crops to meat, and meat have yet to run out of demand (ever) with my 12h cycles; Tool shop on the other hand, gives very little xp, so only keep one for the quests and maybe two for the quest chain at level 13-14; Brewery has been very disappointing, for some reason its demand drops when I plant crops, other then that it works fine. I do not have a green house, so can’t comment on that.

    -About to lose your sharpshooter? Just click on the white flag, 400 iron is A LOT in early game. -Population is the biggest limit to your growth. You are only given so many population and they are never enough. From here on all the tips and tricks are related to population management:

    -Placing more cart to your mines doesn’t make them mine you more resources, aim for 100% efficiency (or above 90, if you like to micro mange your population to maximize their effect).

    -Spend some time on “tapjoy” to get free nanopods, I no longer have the link but a quick google search on your part should work fine. Your main goal is 105 nano, (which isn’t hard using tapjoy, or u can just buy it, whatever works for you) and buy an underground warehouse. I have to admit, warehouse in this game is definitely made to give non-nano players an disadvantage. 8 worker to get only 500 warehouse spot? Get out of here. 105 nano for 4 works to get 2000 warehouse spot, that’s 8 times the effect of an warehouse! Imagine all those population that could go to your production building, all those xp lost for what?

    -Now, there has been suggestion that BN should add the function to allocate workers around, I agree, but sadly, we do not have that right now. What I did to deal with this is simple. those ideal barracks? Sell them, they are eating up 5 population for no reason, especially if you are an builder like me. What about those ideal stone quarries? If you followed my tips, you should have 3 under your control by level 12, you should be filling up your warehouse every night, luckily stone quarries cost close to nothing to build, so I just sell them whenever I need the extra population.

    -I’ve seen people who put up the “don’t attack me flag” yet have a bunch of pillbox, like, are you serious? Don’t waste your population like that.

    -Build farms instead of other higher production building when it comes to temporary population, these you can just sell back when you need populations, I always keep about 5-6 floating workers to fill a new building or get me some extra xp instead of being ideal.{via Crazy4Sand}


    Troops

    Electro Trooper

    Experimental troops not yet deployed in battle, the Electro Troopers are already notorious for their potential for mayhem. Early weapon tests had a roughly 50/50 chance of damaging the Electro Trooper instead of their target. High Command is proud to announce that this has been dramatically improved, to more of a 70/30 chance. More importantly, they’ve modified the Electro Troopers’ XW52 Experimental Shock Rifle such that it can be aimed and fired effectively even while the bearer’s muscles are tensed from the electric current coursing through their body.

    Who are these Electro Troopers? What drives a man to volunteer for an assignment with such a great potential for self harm? There’s no single answer. Some are troubled soldiers, the Electro Trooper squad is their last chance to make it, or wash out of the military completely. Others are brave, self-sacrificing men, willing to endure great pain and likely sterility in order to advance the state of the art in warfare. Most of them just want to melt someone’s face off.

    Unique among ground troops, Electro Troopers can actually short out the electrical systems of most vehicles, incapacitating them for short periods of time. With this ability, Electro Troopers radically change the balance of power on the battlefield.


    Sniper

    Only the most skilled Sharpshooters survive long enough to become full-fledged Snipers. Usually working alone, a single dug-in Sniper can dish out incredible damage to unsuspecting enemies.
    Snipers take their time when engaging enemies, as every shot they take risks compromising their location. To help avoid detection Snipers wear camouflaged Ghillie Suits that allow them to fire their heavily modified .50 caliber M40 rifles while blending into their surroundings.


    Flame Trooper

    Many Imperial children are fascinated by fire. Most grow out of it over the years, but for a few, setting things on fire remains a lifelong obsession. Recognizing an opportunity, High Command imposed strict regulations on recreational fire use, while at the same time creating the Imperial Flame Trooper training program. The plan worked. Without any other outlet – and with the lure of a privileged status within the army – dozens of young men and women volunteer every year.

    Flame Troopers strap large tanks of highly pressurized napalm to their backs, capable of spraying a fan of sticky, flaming death over 50 feet. Post battle reports conclude that being on the business end of a Flame Trooper charge is a truly sphincter-loosening experience. These pressurized tanks are also capable of exploding at the slightest impact – shrapnel, bullet ricochets, sitting down too heavily, etc. The tendency of Imperial Flame Troopers to explode is cause for consternation among the other troops in the front ranks. As such, it has become customary to give Flame Troopers a friendly wave, rather than the more common handshake or ‘bro hug’.

    The recognition that their lives will probably end abruptly engenders Flame Troopers with an air of fatalism. They party hard, and have a culture of staying drunk, and playing pranks.


    Sharpshooter

    Troopers that survive their first deployment receive a 2-hour crash-course in marksmanship and are immediately promoted to Sharpshooters. Deployed behind front-line units, Sharpshooters can turn the tide of a battle with their ability to take long-range shots at smug, high-value targets hiding in the back of enemy formations.

    Imperial Sharpshooters are issued the M9 Designated Marksman Rifle, a bolt-action rifle in service since Emperor Conrad’s border wars a generation ago. A recent study conducted by the Office of Imperial Statistics found that at a distance of 20 feet Sharpshooters were 37% more likely to hit the broad side of a barn than Troopers, due in large part to the Sharpshooters’ tendency to actually aim before pulling the trigger.
    Particularly hated by enemy officers, Sharpshooters have a short life expectancy – which gave rise to their motto, “At least we’re not Troopers.”


    Trooper

    Troopers compose the bulk of the Imperial Army’s front-line forces. Operating under the motto of “First in, Rarely Return”, what these fresh recruits lack in experience and survivability, they make up for with a complete lack of independent thinking, and near-fanatical devotion to the Emperor. Their ability to stop bullets before they hit more important units is also a plus.

    Despite the Empire’s recent advancements in weaponry, Troopers are issued the venerable M-11 Battle Rifle. Although critics point to its low rate of fire, Troopers love the M-11 because of its rugged reliability, and because its semi-automatic fire is more accurate at long range than rifles with burst and automatic modes.
    {via battlenations.com/}